
 |
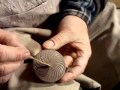
I have been wanting to try imbedding items in resin for ever so long. I recently created some deep well bezels in raku, some unusual in shape. In this experiment I have three standard cabochon shapes to fill and a little boys head. I gathered up a few of my mini-raku pieces and odd supplies and started down the road on a new learning curve:)
I inserted a head pin in the hole I made while the clay was wet...pulled it tight and anchored from the outside with a plasticine clay. Thought I had the hole completely closed off...but the resin will flow through the smallest of openings. A small amount did flow to the outside of the bezel. What I did not expect was the plasticine clay bonding with the resin so well:)
This piece turned out pretty well. I coated the interior well with a black pigment acrylic paint. A white moon shape/face is covered by a small golden capiz shell I found at the beach this summer. I wasn't sure how the resin would react with the shell...but was very pleased. The Ice Resin made the shell translucent, so you can see a faint moon face below. The bat was a paper thin raku piece...another experiment...too fragile to use alone, it works well in this piece protected by the resin. I coated the over lapping wings with the resin front and back...and was happy with the strength it offered.
I threaded small garnets on the head pin to represent drops of blood.

This piece is one of my raku boy's heads that I made hollow to use as a bezel. Another found sea shell, vintage paper clipping of the word Creation, two watch gears and two miniature raku wings with raku frozen Charlotte are included in this piece. That's a lot of things to get into a one inch head:) I painted the interior gold. Everything was arranged before I poured the resin except the paper. I used a plastic dropper to fill the voids carefully without shifting the pieces. The dropper worked well for this purpose. The paper was layered on the wet resin surface and all left to dry. Next day I domed the resin to cover the paper and rest of Charlotte.

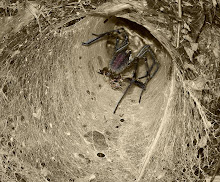
This off the wall oddity has two watch gears, two Milagros and a common house fly encased in the resin. This photo shows the first fill of resin. Next day I domed the resin to completely cover the fly. The background is raku glaze...I had fired this piece on both sides. Same problem with resin seeping out from head pin hole. The fly looks like a broken nose...until you look close and see it is a fly instead:)

And this piece has one of my mini raku Charlottes, mini wings and two watch gears. One to prop up the wings and one used as a halo for the angel. This bezel was raku fired on both sides as well. I love the depth to this piece. I did get some air bubbles...all to one side. This photo shows the piece with first resin fill.
I have not figured out how to photograph the pieces with the resin to show their depth. There is a warmth and charm to them and a nice weight to the finished pieces. I want to touch the smooth surface and bring close to see what is captured.
What I learned from my first resin adventure ...
don't put holes in bezels unless I can find a better way to seal the hole with headpin
level by eye is not level by resin standards
keep a long sewing needle or such handy to burst bubbles or arrange the tiny items
keep a good pair of fine point tweezers handy...fingers are not nimble enough to arrange
wax paper is a must to keep overflow contained and not leave traces on bezel
This is an amazing tool for creating. I also painted some resin on a crumbling old book page to see what it would do. Love that look as well. The resin makes so many things it touches partially transparent.
I look forward to my next adventure... I think I will layer many layers of resin and items to get a real depth of field to the piece. Got to do some collecting though, and remember that what I put in the resin...stays in the resin:)


.jpg)
.jpg)
.jpg)
I love your idea of using the back side of a hollow head as a bezel. I may try that myself.
ReplyDeleteAlways nice to see what you're playing with.
Great job! Playing with resin is so much fun, I love working with it too. Great job on your pieces. Riki
ReplyDeleteLove what you made! :)
ReplyDeleteMakes me want to play with resin again... but it will have to wait till I finish the project I'm working on...
I love what you did. It is addictive, isn't it?
ReplyDeleteTerri
This such a totally creative way to use resin. I work with resin a lot and I love to see people coming up with new and interesting bezels - it makes for the most unique pieces.... and I love unique :)
ReplyDeleteGreat job!
beautiful work! Shells are pourous, so they will absorb resin just like paper and fabric. You can seal them with a spray of acrylic sealer or mod podge. There is a flickr group for ICE Resin, where we pick out people to profile on our blog. http://www.flickr.com/groups/iceresin/
ReplyDeleteWe'd love if you shared your work there too!
How beautiful! I absolutely love these pieces! For some reason I particularly love the bat. Could it be that Halloween is near?
ReplyDelete